


Introduction
Are you ready to explore the fascinating world of local web servers using the powerful ESP32 microcontroller? If so, welcome to my blog! In this post, we'll take a deep dive into the incredible capabilities of the ESP32 and show you step-by-step how to use it to gather data from two incredible sensors - the DHT22 and the ADXL1335. With our guidance, you'll be able to easily host this data on your own local web server, giving you a comprehensive and accessible data stream that can be monitored from any device on the same Wi-Fi network. So, get ready to be amazed as we explore the exciting possibilities of this cutting-edge technology!
Overview of the ESP32, DHT22 and ADXL335 sensors
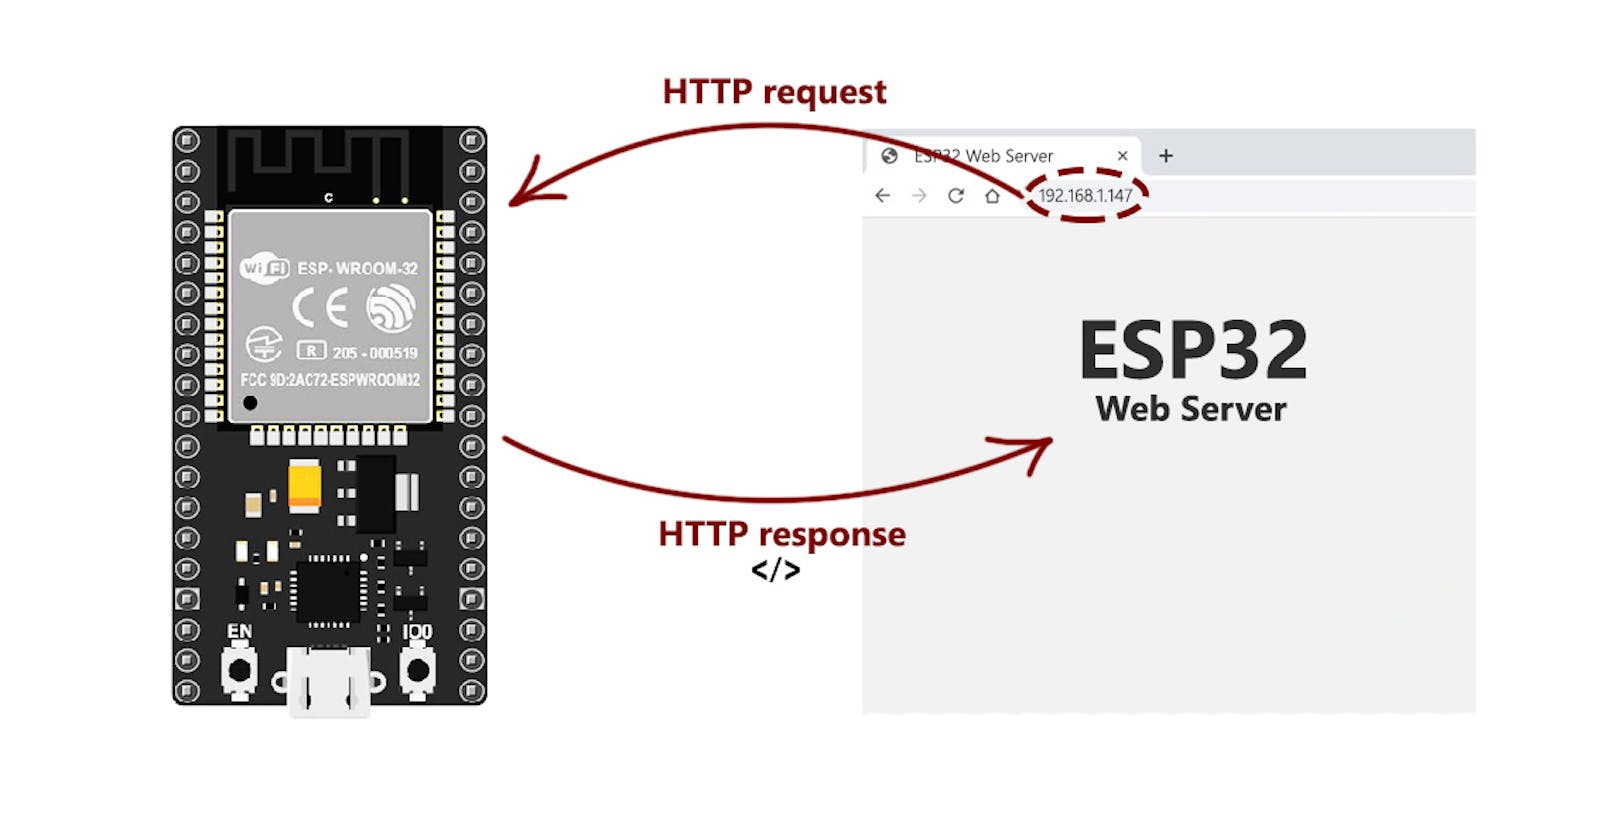
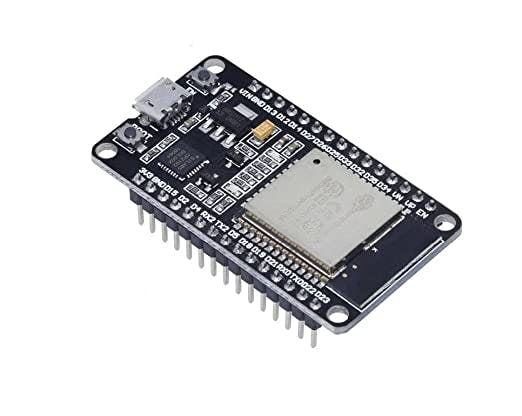
ESP32: The ESP32 is a highly capable microcontroller used in embedded systems and IoT applications. It was developed by Espressif Systems and features built-in Wi-Fi and Bluetooth capabilities. With its dual-core processor and various I/O pins, the ESP32 is a versatile and powerful platform for a range of projects.
DHT22: The DHT22 is a basic, low-cost digital temperature and humidity sensor. It utilizes a capacitive humidity sensor and a thermistor to precisely measure the surrounding air, providing a digital output signal through the data pin. It does not require any analogue input pins to function.

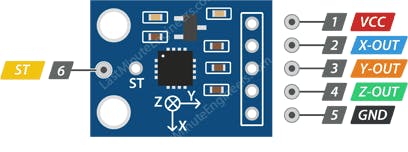
ADXL335: The ADXL335 is a compact and thin accelerometer that is designed to operate with low power consumption. It is a complete 3-axis sensor that produces voltage outputs that are already conditioned for signals. The device is capable of measuring acceleration with a minimum full-scale range of ±3 g, making it an excellent choice for applications that require precise acceleration measurements.
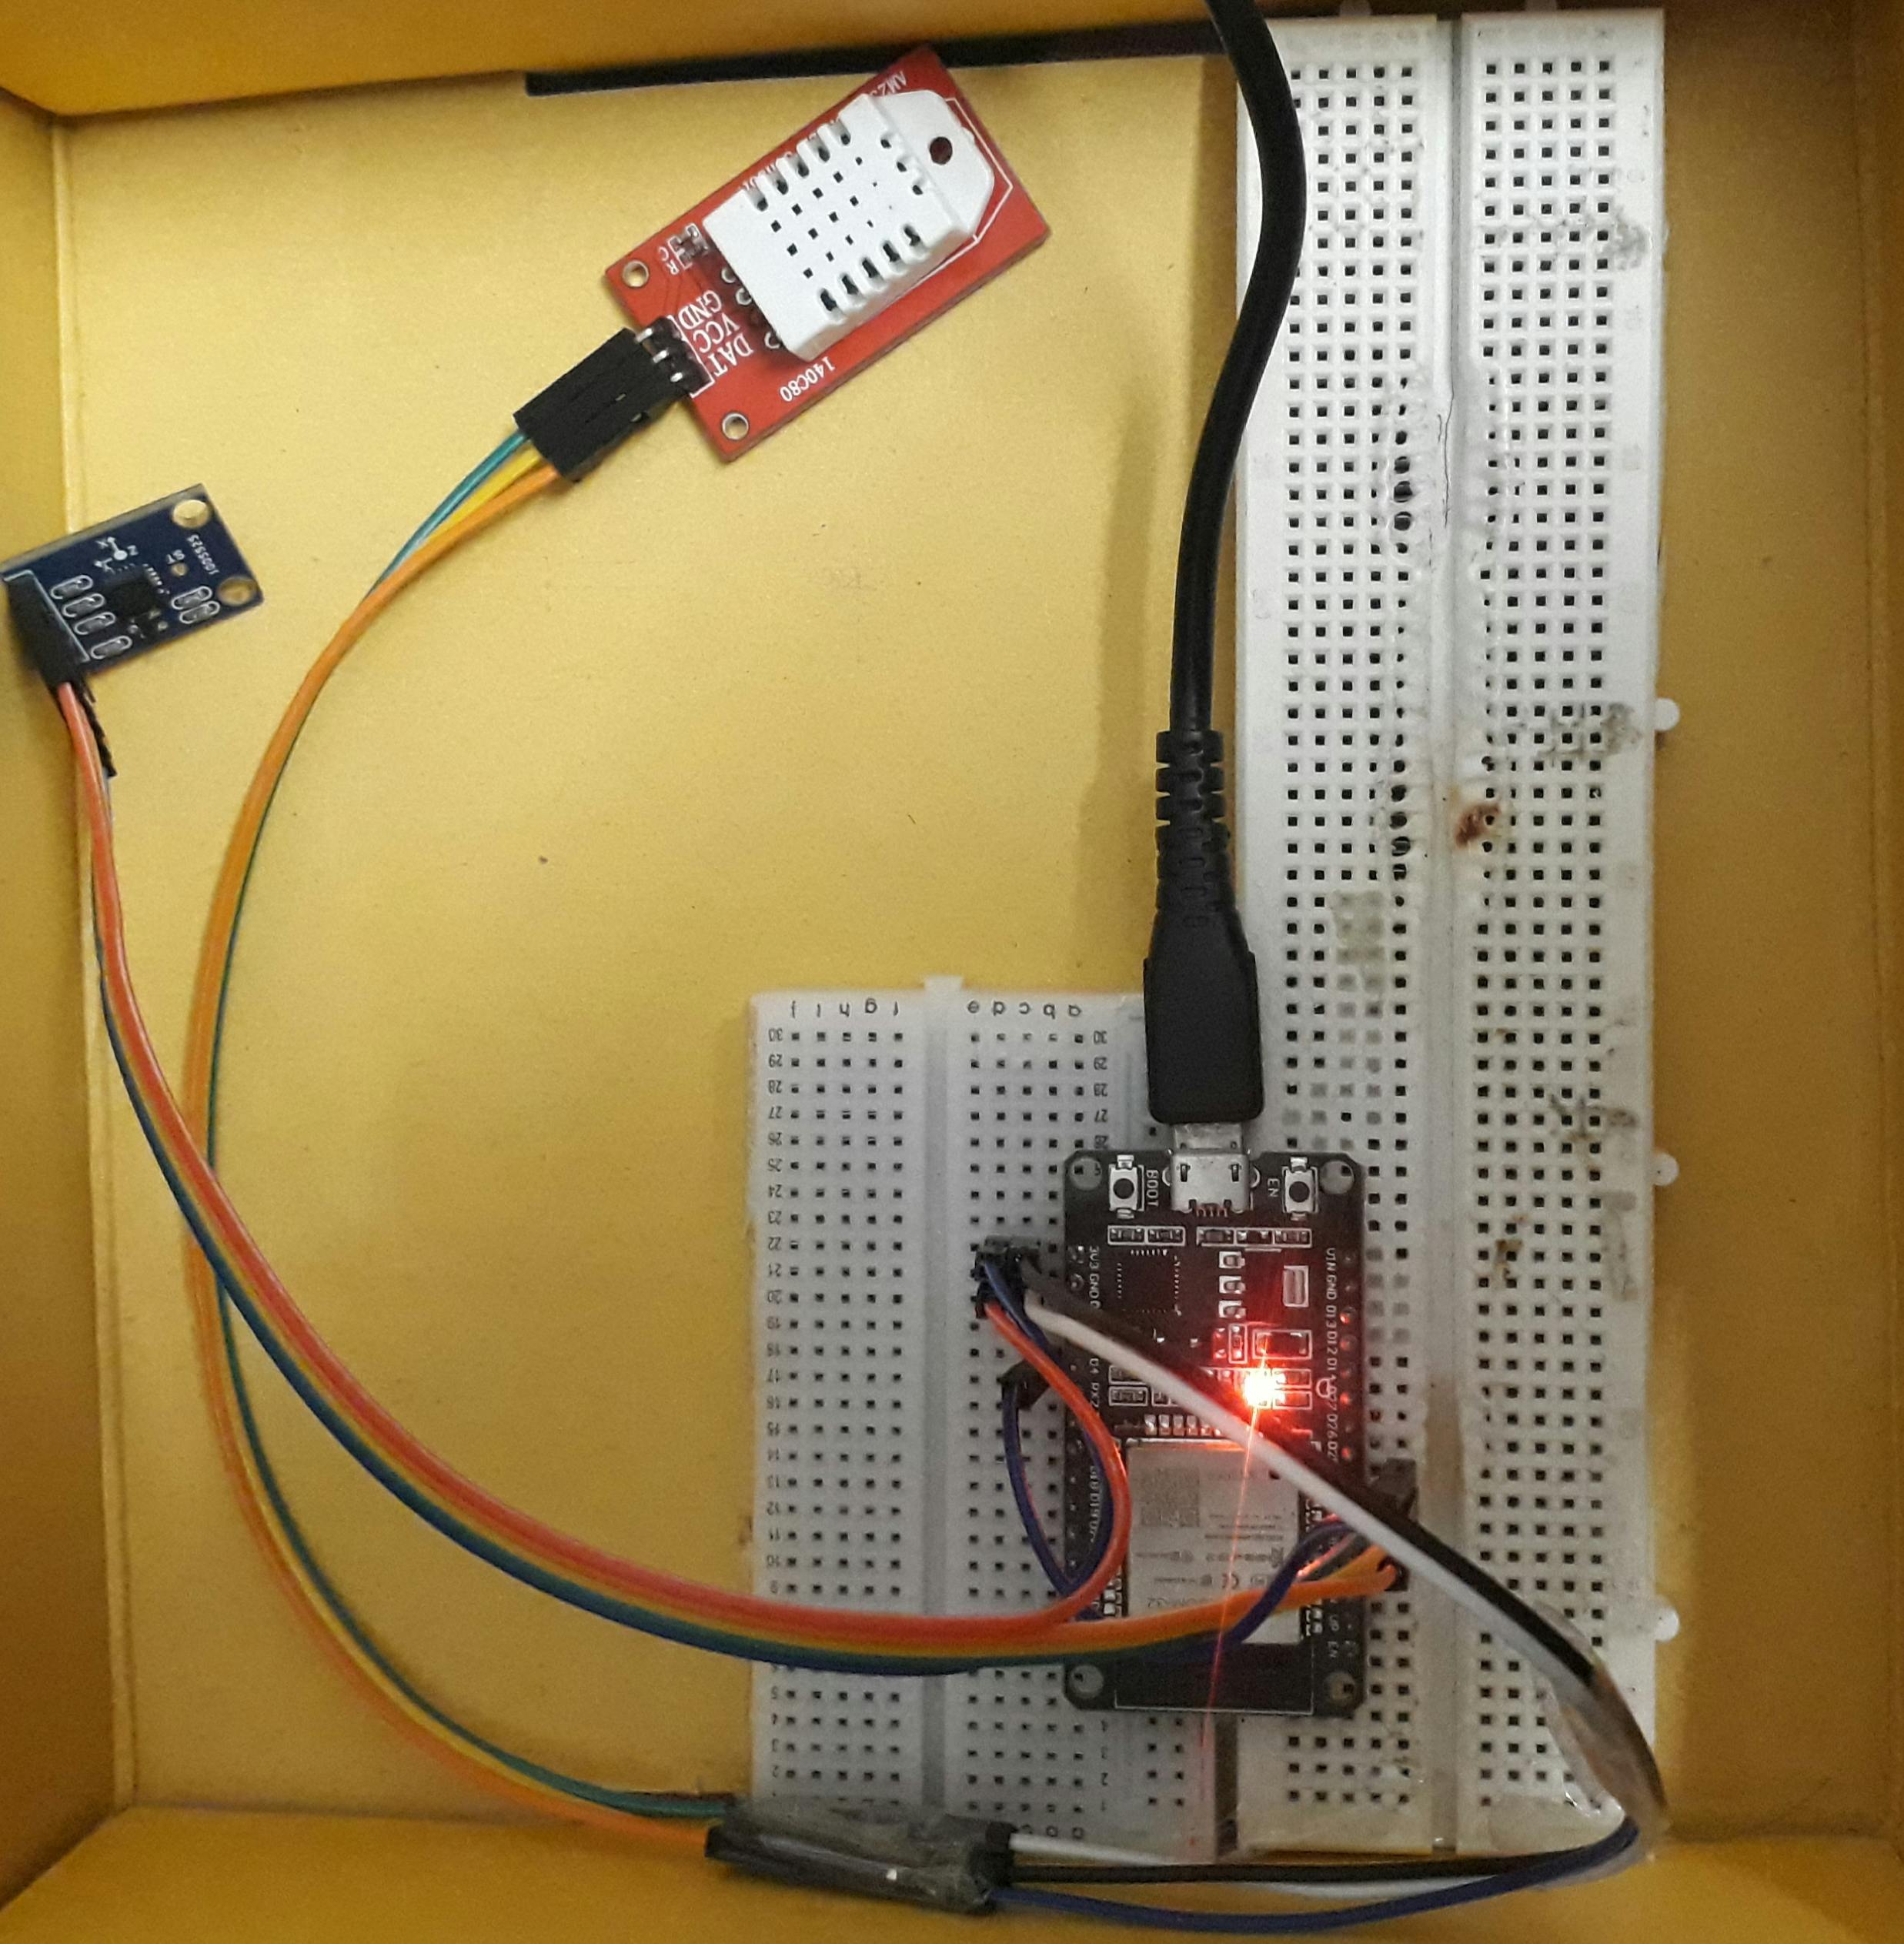
Setting up the hardware connection
Follow these steps:
Connect VCC of DHT22 and ADXL335 to 3V Pin of ESP32.
Connect GND of Both sensors to GND Pin of ESP32.
DAT wire of DHT22 to Pin no. D4 of ESP32.
ADXL335 wires connections.
X-OUT--D33
Y-OUT--D32
Z-OUT--D35
How code works
Let's understand the coding into small blocks:
This code initializes the ESP32 microcontroller and connects it to a Wi-Fi network.
The try and except blocks at the beginning of the code import the usocket library if it's available, but use the standard socket library if it's not.
The code then imports the necessary libraries for data collection, including network, dht, and machine.
The next lines disable debugging and perform garbage collection to ensure optimal performance.
The ssid and password variables contain the Wi-Fi network name and password, respectively. The code then establishes a connection to the network and waits until the connection is successful before printing the connection status and IP address of the ESP32.
try:
  import usocket as socket
except:
  import socket

import network
import dht
from machine import Pin,Timer,ADC

import esp
esp.osdebug(None)

import gc
gc.collect()

ssid = "Veer'sHP"
password = 'Veer@108'

station = network.WLAN(network.STA_IF)

station.active(True)
station.connect(ssid, password)

while station.isconnected() == False:
  pass

print('Connection successful')
print(station.ifconfig())
Now defining the Pin number to the sensors:
The dht_pin variable specifies which type of DHT sensor is being used and which pin it is connected to.
The x, y, and z variables represent the ADC (Analog-to-Digital Converter) pins that are connected to the ADXL335 accelerometer.
dht_pin = dht.DHT22(Pin(4))  # Comment it if you are using DHT11 and uncomment the next line
#dht_pin = dht.DHT11(Pin(4)) # Uncomment it if you are using DHT11 and comment the above line
z = ADC (Pin(35))
x = ADC (Pin (33))
y = ADC (Pin(32))
Now Defining functions for the Sensors
For Measure Temp and Hum read_dht()
This code defines a function named read_dht that reads temperature and humidity data from the DHT22 sensor. The function uses the measure(), temperature(), and humidity() methods to collect sensor data. If the data is valid, the function formats and returns a message with the temperature and humidity values. If there is an error reading the sensor, the function returns a message indicating that the sensor reading has failed.
def read_dht():
  global temp, hum
  temp = hum = 0
  try:
    dht_pin.measure()
    temp = dht_pin.temperature()
    hum = dht_pin.humidity()
    if (isinstance(temp, float) and isinstance(hum, float)) or (isinstance(temp, int) and isinstance(hum, int)):
      msg = (b'{0:3.1f},{1:3.1f}'.format(temp, hum))

      # uncomment for Fahrenheit
      #temp = temp * (9/5) + 32.0

      hum = round(hum, 2)
      return(msg)
    else:
      return('Invalid sensor readings.')
  except OSError as e:
    return('Failed to read sensor.')
For measuring acceleration read_acc()
This code defines a function named read_acc that reads acceleration data from the ADXL335 sensor. The function uses the read() method to collect sensor data and applies mathematical operations to convert the raw values into acceleration values. If the data is valid, the function formats and returns a message with the acceleration values in x, y, and z directions. If there is an error reading the sensor, the function returns a message indicating that the sensor reading has failed.
def read_acc():
  global x_acc, y_acc, z_acc
  x.atten(ADC. ATTN_11DB)
  y.atten(ADC.ATTN_11DB)
  z.atten(ADC.ATTN_11DB)
  x_acc= y_acc= z_acc=0
  try:
    x_value = x.read()
    y_value = y.read()
    z_value = z.read()
    x_acc = ( ( ( (x_value * 3.3)/4096) - 1.65 ) / 0.330 )
    y_acc = ( ( ( (y_value * 3.3)/4096) - 1.65 ) / 0.330 )
    z_acc = ( ( ( (z_value * 3.3)/4096) - 1.80 ) / 0.330 )
    if (isinstance(x_acc, float) and isinstance(y_acc, float)and isinstance(z_acc, float))  or (isinstance(temp, int) and isinstance(hum, int)and isinstance(y_acc, float)):
      msg = (b'{0:3.1f},{1:3.1f},{1:3.1f}'.format(x_acc,y_acc,z_acc))

      # uncomment for Fahrenheit
      #temp = temp * (9/5) + 32.0

      return(msg)
    else:
      return('Invalid sensor readings.')
  except OSError as e:
    return('Failed to read sensor.')
Now move on to the HTML part web_page():
This code is very basic. It will help us to design a web page to show the readings. You can customise this according to your needs.
def web_page():
html = """<html><head>
<meta name="viewport" content="width=device-width, initial-scale=1">
</head>
<body>
<h1>Spark Engineering Project</h1>
<div class="dtt">
<p>tempreture</p><p>"""+str(temp)+"""°C<p>
<p>humidity</p><p>"""+str(hum)+"""%</p>
<h4>acceleration</h4>
<p>x_acc</p><p>"""+str(x_acc)+"""</p>
<p>y_acc</p><p>"""+str(y_acc)+"""</p>
<p>z_acc</p><p>"""+str(z_acc)+"""</p>
</div>
</body></html>"""
return html
TCP socket code:
This code creates a TCP socket object with the specified address family and socket type. It then binds the socket to a specified port number and listens for incoming connections. Once a connection is established, it receives a request from the client, reads sensor readings, prints them to the console, generates a response HTML page, and sends it to the client. Finally, it closes the connection.
s = socket.socket(socket.AF_INET, socket.SOCK_STREAM)
s.bind(('', 80))
s.listen(5)

while True:
  conn, addr = s.accept()
  print('Got a connection from %s' % str(addr))
  request = conn.recv(1024)
  print('Content = %s' % str(request))
  sensor_readings = read_dht()
  sensor_readings2= read_acc()
  print(sensor_readings)
  print(sensor_readings2)
  response = web_page()
  conn.send('HTTP/1.1 200 OK\n')
  conn.send('Content-Type: text/html\n')
  conn.send('Connection: close\n\n')
  conn.sendall(response)
  conn.close()
Complete code :
try:
import usocket as socket
except:
import socket
import network
import dht
from machine import Pin,Timer,ADC
import esp
esp.osdebug(None)
import gc
gc.collect()
ssid = "Veer"
password = 'Veer108'
station = network.WLAN(network.STA_IF)
station.active(True)
station.connect(ssid, password)
while station.isconnected() == False:
pass
print('Connection successful')
print(station.ifconfig())
dht_pin = dht.DHT22(Pin(4)) # Comment it if you are using DHT11 and uncomment the next line
#dht_pin = dht.DHT11(Pin(4)) # Uncomment it if you are using DHT11 and comment the above line
z = ADC (Pin(35))
x = ADC (Pin (33))
y = ADC (Pin(32))
def read_dht():
global temp, hum
temp = hum = 0
try:
dht_pin.measure()
temp = dht_pin.temperature()
hum = dht_pin.humidity()
if (isinstance(temp, float) and isinstance(hum, float)) or (isinstance(temp, int) and isinstance(hum, int)):
msg = (b'{0:3.1f},{1:3.1f}'.format(temp, hum))
# uncomment for Fahrenheit
#temp = temp * (9/5) + 32.0
hum = round(hum, 2)
return(msg)
else:
return('Invalid sensor readings.')
except OSError as e:
return('Failed to read sensor.')
def read_acc():
global x_acc, y_acc, z_acc
x.atten(ADC. ATTN_11DB)
y.atten(ADC.ATTN_11DB)
z.atten(ADC.ATTN_11DB)
x_acc= y_acc= z_acc=0
try:
x_value = x.read()
y_value = y.read()
z_value = z.read()
x_acc = ( ( ( (x_value * 3.3)/4096) - 1.65 ) / 0.330 )
y_acc = ( ( ( (y_value * 3.3)/4096) - 1.65 ) / 0.330 )
z_acc = ( ( ( (z_value * 3.3)/4096) - 1.80 ) / 0.330 )
if (isinstance(x_acc, float) and isinstance(y_acc, float)and isinstance(z_acc, float)) or (isinstance(temp, int) and isinstance(hum, int)and isinstance(y_acc, float)):
msg = (b'{0:3.1f},{1:3.1f},{1:3.1f}'.format(x_acc,y_acc,z_acc))
# uncomment for Fahrenheit
#temp = temp * (9/5) + 32.0
return(msg)
else:
return('Invalid sensor readings.')
except OSError as e:
return('Failed to read sensor.')
def web_page():
html = """<html><head>
<meta name="viewport" content="width=device-width, initial-scale=1">
</head>
<body>
<h1>Spark Engineering Project</h1>
<div class="dtt">
<p>tempreture</p><p>"""+str(temp)+"""°C<p>
<p>humidity</p><p>"""+str(hum)+"""%</p>
<h4>acceleration</h4>
<p>x_acc</p><p>"""+str(x_acc)+"""</p>
<p>y_acc</p><p>"""+str(y_acc)+"""</p>
<p>z_acc</p><p>"""+str(z_acc)+"""</p>
</div>
</body></html>"""
return html
s = socket.socket(socket.AF_INET, socket.SOCK_STREAM)
s.bind(('', 80))
s.listen(5)
while True:
conn, addr = s.accept()
print('Got a connection from %s' % str(addr))
request = conn.recv(1024)
print('Content = %s' % str(request))
sensor_readings = read_dht()
sensor_readings2= read_acc()
print(sensor_readings)
print(sensor_readings2)
response = web_page()
conn.send('HTTP/1.1 200 OK\n')
conn.send('Content-Type: text/html\n')
conn.send('Connection: close\n\n')
conn.sendall(response)
conn.close()
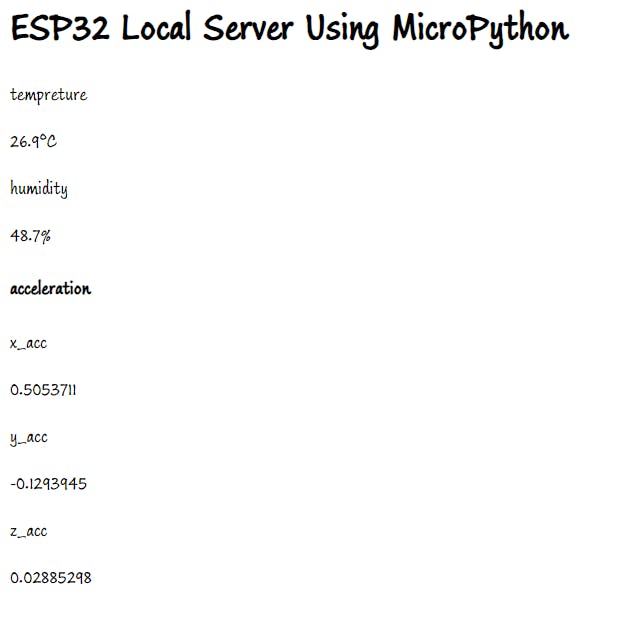
How it looks like:
Click on the run button in the Thonny editor.

Wait for a while, it will connect with WiFi network in 2-3 seconds.

Copy the IP address from the serial window and Paste it on the device which is connected to the same WiFi network.
Here is the final view of the outputs:
Thank you for taking the time to read this article. If you found it informative, please consider sharing it with your friends and colleagues who may also find it helpful.